Discover Studios, Services & More Across USA | StudioBDTLA
Best Lighting Solutions for Studio Spaces
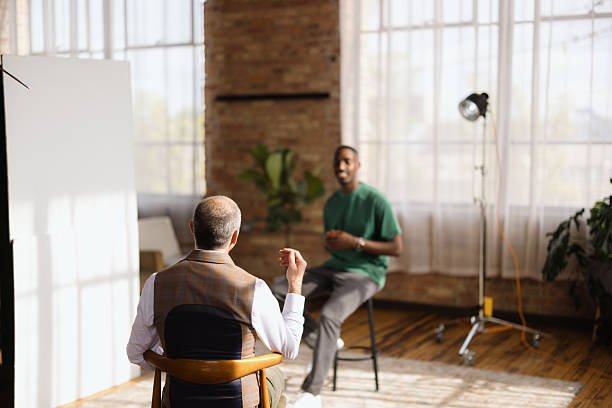
Lighting is the heartbeat of any creative studio. Whether you’re shooting professional photography, filming YouTube content, recording interviews, or live streaming, the right lighting transforms your output from average to outstanding. In studio environments—where natural light may be limited or inconsistent—smart lighting solutions ensure every shot is crisp, clear, and beautifully balanced.
In 2025, lighting technology continues to evolve, offering more versatile, efficient, and customizable options than ever before. This guide explores the best lighting solutions for studio spaces, helping you make informed decisions based on your creative needs and budget.
Why Lighting Matters in a Studio Setting
Lighting affects more than just how your work looks. It shapes the mood of your content, determines the clarity of your visuals, and even influences how long you can work comfortably.
Whether you’re working in photography, videography, product design, or live content creation, quality lighting provides:
Professional image quality
Color consistency and accuracy
Fewer editing corrections
An inspiring creative environment
Improved audience engagement for live or recorded content
Let’s break down what you need to create a fully optimized lighting setup for your studio.
Key Elements of Studio Lighting
To understand studio lighting solutions, start by learning the three foundational components of a lighting setup.
Key Light
The key light is your primary source of illumination. It defines the subject’s features, sets the tone, and is usually the brightest light in your setup. It’s placed at a 45° angle from the subject for a flattering, natural look.
Fill Light
The fill light softens shadows created by the key light. It’s less intense and usually placed opposite the key light. You can also use reflectors or diffused lights to serve this role.
Back Light (or Hair Light)
Back lighting adds separation between the subject and the background. It enhances depth and dimension, especially useful in portrait or product photography.
Mastering this three-point lighting system gives your visuals a clean, professional finish that works in nearly any content format.
Types of Studio Lighting
Different light types serve different purposes. Your choice should depend on your content style, space, and the amount of control you need over your lighting environment.
LED Panel Lights
LED panels are the most popular lighting solution in modern studios due to their energy efficiency, adjustable brightness, and compact design.
Best for: Video production, interviews, YouTube, streaming
Pros: Dimmable, long-lasting, cool temperature, often come with adjustable color temperature
Top Brands: Aputure Amaran, Godox, Neewer, Elgato Key Light
Softbox Lights
Softboxes diffuse light to reduce harsh shadows, creating a flattering look—especially great for portraits and beauty content.
Best for: Photography, talking-head videos, product shoots
Pros: Natural-looking light, large spread, excellent for skin tones
Top Brands: Neewer, GVM, Fovitec
Ring Lights
Ring lights offer even, direct lighting that eliminates most facial shadows. They’re ideal for front-facing video content and beauty shots.
Best for: TikTok, makeup tutorials, Zoom calls, vlogs
Pros: Compact, easy to use, affordable
Top Brands: Lume Cube, Neewer, UBeesize
Strobe and Flash Lights
Strobe lights (flashes) are powerful, short-burst lights for capturing high-resolution images in a still photography setting.
Best for: Fashion, portrait, and commercial photography
Pros: Very bright, customizable modifiers, freezes motion
Top Brands: Profoto, Godox, Broncolor
Continuous Lights
Unlike strobes, continuous lights stay on while you shoot. They’re ideal for video because you can see the lighting effect in real time.
Best for: Filmmaking, green screen work, interviews
Pros: Real-time visibility, easier to adjust mid-shoot
Top Brands: Aputure, ARRI, Nanlite
Color Temperature and CRI
Lighting quality is not just about brightness—it’s also about color and accuracy.
Understanding Color Temperature
Measured in Kelvin (K), color temperature determines the “warmth” or “coolness” of your lighting:
2700K – 3200K: Warm white (incandescent)
4000K – 5000K: Neutral white (daylight balance)
5500K – 6500K: Cool white (studio daylight)
Daylight-balanced lighting (around 5600K) is the most versatile for studio work, offering natural tones that are easy to color correct.
CRI (Color Rendering Index)
CRI measures how accurately a light source displays colors compared to natural light. A CRI of 90+ is considered excellent for studio work.
Always choose lights with a high CRI rating to ensure color fidelity, especially for fashion, beauty, and product content.
Studio Lighting by Content Type
Your specific creative work determines which lighting setup will work best for you.
Photography Studios
Photographers benefit from lights that offer precision, modifiability, and power. A common studio photography setup includes:
Two softboxes (key and fill light)
One strobe or speedlight with a diffuser
Reflectors and bounce cards
Optional background lights or color gels
Photographers shooting portraits or fashion often add a hair light or kicker to sculpt facial features and add polish.
Video Production and YouTubers
YouTube and video creators prioritize flexibility and simplicity. A practical lighting kit may include:
Key light: LED panel or softbox
Fill light: Smaller LED or bounce
Back light: Small directional LED with barn doors
Optional: RGB lights for background accents or mood
Using app-controlled LED lights allows you to fine-tune intensity and warmth without leaving your desk.
Streamers and Content Creators
Streamers focus on lighting that flatters their face and doesn’t overheat the room during long sessions.
Ring light or panel mounted on monitor
Side fill lights for depth
LED strips or RGB lights for background flair
Consistent, flicker-free lighting to avoid distracting your audience
Elgato Key Lights are especially popular due to their desk-clamp design and app control features.
Product and Commercial Shoots
Product photography and e-commerce content demand precision lighting to highlight texture, color, and material.
Tabletop light tent
Overhead soft light
Side kicker lights
Reflectors and bounce cards
Macro-friendly ring lights
For glossy or metallic products, polarizing filters and gradient background lights can eliminate glare and add contrast.
Smart and Wireless Lighting Options
Modern studios benefit from smart lighting systems that enhance productivity and reduce setup time.
Wi-Fi or Bluetooth control via smartphone
Pre-saved lighting scenes
Voice control (Alexa, Google Assistant)
DMX compatibility for complex setups
Brands like Aputure and Nanlite now offer app ecosystems where you can control brightness, temperature, and color in real time.
Mounting and Positioning Tools
Lighting quality also depends on how well your gear is placed and stabilized.
Light stands with adjustable height
Boom arms for overhead lighting
C-stands for heavy or angled lighting
Clamps for mounting to desks or shelves
Wall mounts for space-saving options
Flexible mounting options ensure you can adapt your lighting to different creative situations.
Accessories That Enhance Lighting
Light doesn’t act alone—it interacts with modifiers, filters, and surfaces. These tools help you sculpt and control your setup.
Softboxes and umbrellas: Soften and spread light
Barn doors: Focus and shape light
Diffusion panels: Reduce harshness for a cinematic look
Gels and filters: Add color effects or correct color temperature
Reflectors: Bounce light to fill in shadows
Even one modifier can dramatically improve the final look of your shot or scene.
Budget-Friendly Lighting Setups
You don’t need a Hollywood budget to get pro lighting results. Here are simple kits under different price points:
Under $200
Ring light with tripod
Two LED panels with stands
Basic reflectors or foam boards
Entry-level softbox kit
Under $500
Aputure Amaran or Godox LED kit
Dimmable softbox with high-CRI LEDs
Adjustable RGB back lights
Sturdy boom stand or C-stand
Under $1000
Multi-light Aputure or Nanlite kit
Smartphone-controlled app integration
High-end modifiers
CRI 95+ lights for color accuracy
Start with a basic setup and scale gradually based on your growing needs.
Final Thoughts
Lighting is the most transformative part of a studio setup. It’s not just about visibility—it’s about mood, dimension, and detail. Investing in the right lighting solutions sets the stage for high-quality content that looks and feels professional.
Whether you’re a photographer building your first setup, a streamer upgrading your home studio, or a brand running in-house shoots, great lighting helps you shine—literally and creatively.
Take the time to experiment with different setups and modifiers until you find what works best for your style and space. And remember: you don’t need the most expensive gear—just the most intentional lighting.