Discover Studios, Services & More Across USA | StudioBDTLA
How to Host a Virtual Event from Your LA Studio (2025 Guide)
Introduction
The way we connect, educate, and entertain has transformed, and in 2025, virtual events are no longer just a pandemic-era solution—they’re a permanent part of the creative and business landscape. Whether you’re streaming a product launch, hosting a digital concert, filming a virtual panel, or teaching a live masterclass, your studio setup can make or break the experience.
Table of Contents
Los Angeles, with its vast network of production-ready studios and world-class tech infrastructure, is the perfect city to host a professional virtual event. But success requires more than just fast Wi-Fi and a ring light. To truly engage your online audience and deliver an event that looks and feels polished, you need a studio equipped for digital production—and a plan that merges technical execution with creative delivery.
In this guide, we’ll walk you through how to host a high-impact virtual event from your LA studio, including setup tips, equipment suggestions, platform selection, and production best practices.
Why Choose an LA Studio for Virtual Events
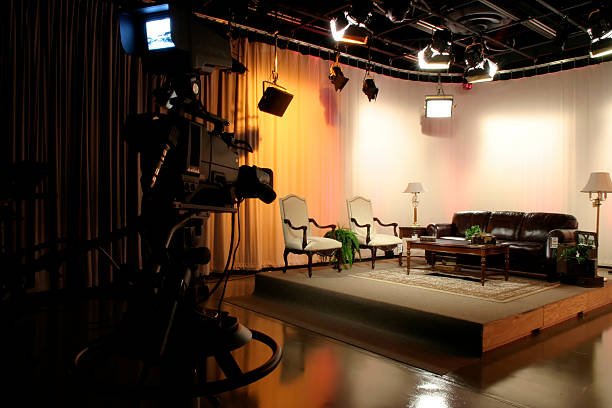
Los Angeles offers unique advantages when it comes to virtual events. The city’s abundance of creative spaces, equipment rental services, and freelance talent means you can design and execute a production-grade livestream that feels like a televised broadcast.
Top reasons to host your virtual event from an LA studio:
- Access to turnkey production facilities with soundproofing, lighting rigs, and fiber internet
- Aesthetic variety—choose from minimalist lofts, color-cyclorama studios, industrial spaces, or green screen stages
- Proximity to experienced crew including videographers, lighting techs, livestream engineers, and set designers
- Flexible booking—studios can be rented hourly or daily, tailored to your budget and scale
Whether your audience is 50 or 5,000, a professionally staged virtual event builds trust, drives engagement, and leaves a lasting impression.
Step 1: Define Your Event Type and Objectives
Before booking any space or gear, get crystal clear on what kind of virtual event you’re hosting and what you want it to achieve.
Common virtual event types include:
- Product launches or brand reveals
- Virtual concerts, DJ sets, or performances
- Live workshops or educational seminars
- Interactive Q&A sessions or virtual meetups
- Webinars or industry panels
- Fundraisers or nonprofit galas
Once you define the format, outline your goals. Are you looking to drive sales, generate leads, entertain your community, or share valuable insights? Knowing this will guide your production choices—from camera setup to how you structure your run of show.
Step 2: Choose the Right LA Studio Space
Your studio should reflect your brand, support your technical needs, and offer a comfortable space for your team. In LA, there’s no shortage of studio types to choose from.
Key features to prioritize:
- High-speed, wired internet (at least 100 Mbps upload)
- Good acoustics or soundproofing
- Built-in lighting grid or natural light options
- On-site technical support or gear rental partnerships
- Background versatility (blank walls, cyc walls, or stage sets)
Popular platforms to find suitable studios:
- Peerspace – Ideal for creative spaces with built-in gear
- Giggster – Great for commercial productions
- AVVAY – Offers curated spaces and some with podcast/livestream support
Neighborhoods like Burbank, North Hollywood, and Downtown LA (Arts District) are especially popular for virtual production because they’re close to equipment rental houses and experienced freelancers.
Step 3: Set Up the Right Equipment
Your gear setup will directly influence the visual and audio quality of your stream. You can bring your own or rent from local LA vendors like ShareGrid, Samy’s Camera Rentals, or Stray Angel Films.
Here’s a checklist of essentials:
Video
- Mirrorless or cinema cameras (Sony FX3, Canon R5C, Blackmagic 6K)
- HDMI or SDI capture cards (Elgato Cam Link, Blackmagic ATEM Mini)
- Tripods or stabilizers for smooth framing
Audio
- Lavalier or shotgun microphones (Rode Wireless PRO, Sennheiser MKE600)
- Audio interface or external mixer (Focusrite Scarlett, Zoom H6)
- Acoustic panels or blankets to reduce echo in minimal studios
Lighting
- Softbox lighting kits (Aputure Light Dome with 300x or 600c)
- Fill lights and rim lights for depth and separation
- Color LEDs or tube lights (Nanlite PavoTubes, Astera Titan) for branded visuals
Streaming
- OBS Studio, Restream, or StreamYard for managing your broadcast
- Ethernet connection (avoid Wi-Fi when possible)
- Backup devices (laptop or secondary camera) in case of failure
Bonus Tools
- Teleprompter or confidence monitor
- Multi-camera switchers for panel-style setups
- On-screen graphics for branding, captions, and calls-to-action
Step 4: Choose Your Streaming Platform
Different platforms serve different purposes. Choose based on your goals, audience size, and engagement features.
Top virtual event platforms in 2025:
- YouTube Live – Best for public, high-visibility events
- Zoom Events – Great for controlled audiences and interactivity
- Vimeo Livestream – Premium feel with gated access and analytics
- Twitch – Ideal for entertainment, music, and long-form streaming
- Hopin or Airmeet – Designed for multi-session conferences with breakout rooms
- Instagram Live or TikTok Live – Good for mobile-native audiences and casual branding
Make sure to test your stream on your chosen platform in advance. Each service has different encoding requirements and latency settings.
Step 5: Create a Run of Show
A successful virtual event runs on a tight, well-paced schedule. Even if it looks casual on-screen, your team should follow a detailed outline of what happens and when.
Your run of show should include:
- Intro slide or countdown timer
- Welcome and speaker introductions
- Key talking points or segments
- Multimedia transitions (videos, slides, music)
- Q&A or audience interaction
- Calls to action (subscribe, donate, visit link)
- Wrap-up and thank-you message
Assign roles: one person runs the stream software, another monitors live chat, and someone cues graphics or transitions.
Step 6: Brand the Experience
A studio space gives you the opportunity to fully brand your visual environment.
Ways to elevate your branding:
- Use colored LED lights that match your brand palette
- Add on-screen text or overlays with your logo, hashtags, or taglines
- Incorporate physical signage or branded props in the background
- Design lower-thirds for speaker names and social handles
- Dress talent in cohesive or on-theme outfits
Think of your virtual event as a live ad for your brand—make sure every frame feels intentional.
Step 7: Promote and Engage
Start promoting your event at least two weeks in advance. Use social media, email blasts, and cross-promotion with collaborators or guest speakers.
Tips for maximizing engagement:
- Create short teaser videos filmed in your studio space
- Share BTS content to build anticipation
- Use countdowns, polls, or giveaways during the livestream
- Encourage real-time interaction through comments or emoji reactions
- Save and repurpose your recorded stream into short-form clips
And don’t forget the post-event strategy—email attendees, send a thank-you video, and share highlights on your socials.
Conclusion
Hosting a virtual event in 2025 means more than logging into a platform—it’s about creating a seamless, branded, high-quality digital experience that reflects your values and vision. With access to some of the best studios, gear, and creative professionals in the world, Los Angeles is the perfect place to bring your virtual event to life.
By choosing the right space, investing in solid production, and thinking like a director, you’ll engage your audience and deliver content that feels polished, premium, and unforgettable.