Discover Studios, Services & More Across USA | StudioBDTLA
How To Take Long Exposure Photography
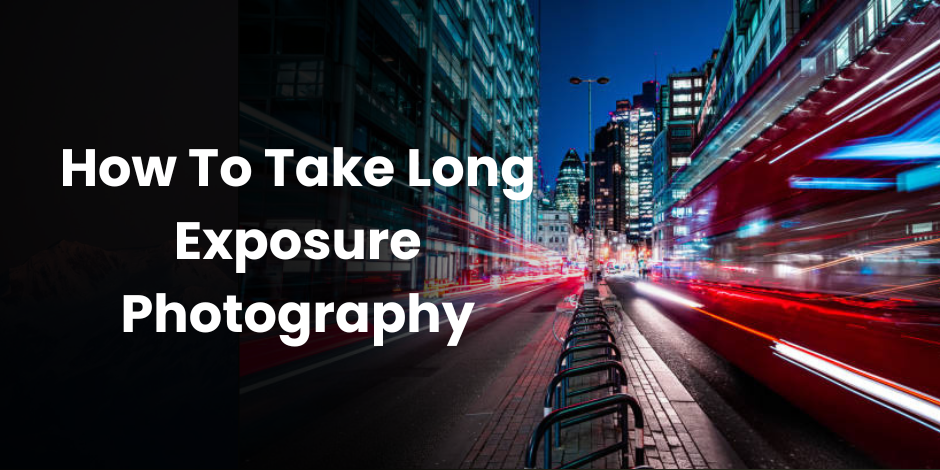
Long exposure photography is a magical way to capture scenes that the human eye cannot see. Whether it’s the silky smooth flow of a waterfall or the mesmerizing trails of stars across the night sky, long exposure photography allows you to capture the passage of time in a single frame. If you’re a budding photographer eager to explore this captivating technique, you’ve come to the right place. In this blog post, we’ll take you through everything you need to know to get started with long exposure photography.
What Is Long Exposure Photography?
Long exposure photography involves using a slow shutter speed to capture stationary elements of a scene while blurring or smearing moving elements. This technique is often used to photograph landscapes, cityscapes, and other subjects where movement can add a unique and creative touch.
Using a slow shutter speed allows more light to hit the camera sensor over a longer period. This can create breathtaking effects, such as smooth water surfaces, light trails from vehicles, and even star trails in the night sky. The result is an image that beautifully captures the essence of time and motion.
Essential Equipment for Long Exposure Photography
To master long exposure photography, you’ll need some essential gear. Having the right equipment can make a significant difference in the quality of your shots.
Camera and Lenses
Any camera that allows you to manually control shutter speed, aperture, and ISO settings will work for long exposure photography. DSLRs and mirrorless cameras are ideal choices. Additionally, having a variety of lenses, especially wide-angle lenses, can help you capture stunning landscapes and cityscapes.
Tripod
A sturdy tripod is crucial for long exposure photography. Since you’ll be using slow shutter speeds, keeping your camera stable is essential to avoid blurry images. Invest in a high-quality tripod that can withstand wind and other environmental factors.
Remote Shutter Release
A remote shutter release or an intervalometer allows you to trigger the camera’s shutter without touching it. This minimizes the risk of camera shake, ensuring sharp images. Some cameras also have built-in timers or smartphone apps that serve the same purpose.
Understanding Shutter Speed
Shutter speed is a key element in long exposure photography. It determines how long the camera’s sensor is exposed to light. Adjusting the shutter speed allows you to control the amount of motion blur in your images.
Slow Shutter Speeds
For long exposure photography, you’ll typically use slow shutter speeds ranging from a few seconds to several minutes. The exact duration depends on the effect you want to achieve and the subject you’re photographing.
Experimenting with Shutter Speed
Experimenting with different shutter speeds can yield varying results. For example, a shutter speed of 5-10 seconds can create smooth water effects, while a shutter speed of 30 seconds or more can capture stunning star trails. Don’t be afraid to play around and see what works best for your scene.
Choosing the Right Aperture and ISO
In addition to shutter speed, aperture and ISO settings play a crucial role in long exposure photography. Balancing these settings helps you achieve the desired exposure and depth of field.
Aperture Settings
The aperture controls the amount of light entering the camera and affects the depth of field. For long exposure photography, a smaller aperture (higher f-number) is often used to ensure a deep depth of field, keeping most of the scene in focus. However, the exact aperture setting depends on the lighting conditions and the effect you want to achieve.
ISO Settings
ISO determines the camera’s sensitivity to light. For long exposures, it’s best to use a low ISO setting (usually between 100 and 400) to minimize noise and ensure high-quality images. Higher ISO settings can introduce noise, which can detract from the overall clarity of your photo.
Using Neutral Density (ND) Filters
Neutral Density (ND) filters are essential tools for long exposure photography. They reduce the amount of light entering the lens, allowing you to use slower shutter speeds even in bright conditions.
Types of ND Filters
ND filters come in various strengths, measured in stops. Common options include 3-stop, 6-stop, and 10-stop ND filters. The higher the stop value, the more light the filter blocks, enabling longer exposures. Some photographers also use variable ND filters, which allow you to adjust the strength as needed.
When to Use ND Filters
ND filters are particularly useful when shooting during daylight hours or in bright environments. They allow you to achieve long exposures without overexposing your images. For example, if you want to capture smooth water effects in a waterfall or create motion blur in a busy street scene, an ND filter is your best friend.

Finding the Perfect Location
Location is key to successful long exposure photography. Look for scenes with significant movement or dynamic elements that will be enhanced by the long exposure technique.
Ideal Subjects for Long Exposure
Some ideal subjects for long exposure photography include:
- Waterfalls and rivers: Capturing the smooth flow of water.
- Cityscapes: Creating light trails from moving vehicles.
- Night skies: Photographing star trails and the Milky Way.
- Beaches: Achieving misty effects from crashing waves.
Scouting Locations
Take the time to scout potential locations before your shoot. Consider visiting at different times of the day to understand how lighting conditions change. This will help you plan your shots and make the most of your time on-site.
Planning Your Shoot
Proper planning is essential for a successful long exposure photography session. Consider factors such as weather, timing, and safety.
Checking the Weather
Weather conditions can significantly impact your long exposure shots. Clear skies are ideal for capturing star trails, while cloudy days can add drama to landscape shots. Check the weather forecast before heading out to ensure optimal conditions.
Timing Your Shoot
The timing of your shoot is crucial. Early mornings and late afternoons, known as the golden hour, offer soft, warm lighting that enhances the beauty of long exposure shots. For night photography, plan your shoot on a clear night away from city lights to minimize light pollution.
Staying Safe
Safety should always be a priority when shooting in remote or challenging locations. Inform someone about your plans, carry necessary supplies, and be aware of your surroundings. If you’re shooting at night, bring a flashlight and any other equipment you might need.
Setting Up Your Shot
Once you arrive at your chosen location, take your time to set up the shot. Careful preparation ensures you capture the best possible image.
Composing the Frame
Composition is key to creating visually appealing long exposure shots. Use leading lines, symmetry, and the rule of thirds to guide the viewer’s eye through the image. Pay attention to the placement of moving elements to achieve the desired effect.
Focusing the Camera
Achieving sharp focus is essential in long exposure photography. Use manual focus to precisely control the focus point. For night shots, autofocus may struggle, so consider using a flashlight to illuminate the subject while focusing.
Using a Remote Shutter Release
Attaching a remote shutter release to your camera minimizes camera shake and ensures sharp images. If you don’t have a remote, use the camera’s built-in timer function to achieve the same result.
Post-Processing Your Long Exposure Photos
Post-processing is a crucial step in enhancing your long exposure photos. Software like Adobe Lightroom and Photoshop offers powerful tools to fine-tune your images.
Basic Adjustments
Start with basic adjustments such as exposure, contrast, and white balance. These adjustments help bring out the details in your image and set the foundation for further edits.
Noise Reduction
Long exposures can introduce noise, especially in low-light conditions. Use noise reduction tools in your editing software to minimize noise while preserving important details.
Enhancing Colors and Details
Enhance the colors and details in your image to make it pop. Adjust the vibrance and saturation to bring out the rich colors captured during your long exposure. Use tools like the clarity and sharpening sliders to enhance the fine details.
Common Challenges in Long Exposure Photography
Long exposure photography comes with its own set of challenges. Understanding and overcoming these challenges will help you improve your skills and achieve better results.
Light Leaks
Light leaks can occur when unwanted light enters the camera during a long exposure. To prevent this, cover the viewfinder and ensure there are no gaps where light can enter. Some cameras have a built-in viewfinder cover for this purpose.
Camera Shake
Even with a sturdy tripod, camera shake can still occur, especially in windy conditions. Use a weight bag or hang your camera bag from the tripod to add stability. Additionally, using a remote shutter release or the camera’s timer function helps minimize shake.
Overexposure
Overexposure can be a common issue in long exposure photography, especially in bright conditions. ND filters can help reduce the amount of light entering the lens, allowing you to achieve the desired exposure without overexposing the image.
FAQs about Long Exposure Photography
What is the best time of day for long exposure photography?
The best time for long exposure photography is during the golden hour (early morning or late afternoon) and at night. These times offer soft, flattering light and minimal harsh shadows.
Can I use my smartphone for long exposure photography?
Yes, many smartphones have built-in long exposure modes or apps that allow you to achieve long exposure effects. While a dedicated camera offers more control and quality, smartphones can still produce impressive results.
Do I need expensive equipment for long exposure photography?
While high-quality equipment can enhance your results, you don’t need the most expensive gear to get started. A basic camera with manual controls, a sturdy tripod, and a remote shutter release are sufficient for capturing stunning long exposure shots.
Conclusion
Long exposure photography is a fascinating technique that allows you to capture the beauty of time and motion in a single frame. By understanding the essential equipment, mastering the settings, and planning your shoots carefully, you can create breathtaking images that stand out.
Don’t hesitate to experiment and push the boundaries of your creativity. With practice and dedication, you’ll soon become proficient in long exposure photography and capture scenes that leave a lasting impression.
Ready to start your long exposure photography journey? Grab your camera, find a captivating location, and start capturing the magic of time and light. Happy shooting!