Discover Studios, Services & More Across USA | StudioBDTLA
The Making of a Perfect Studio Portrait
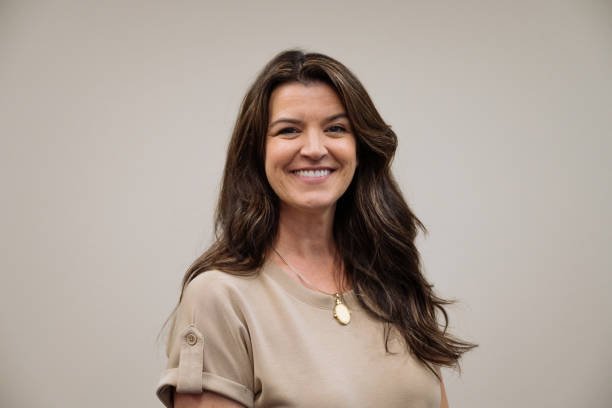
Studio portrait photography is an art that combines technical expertise with creative vision. Whether you’re a beginner or an experienced photographer, mastering the elements that make up a flawless studio portrait—from posing and lighting to retouching—can take your work to the next level.
In this blog, we’ll break down every step of the process, providing valuable tips and insights to help you create stunning studio portraits. By the end, you’ll have a comprehensive understanding of what it takes to produce professional-quality images.
1. Setting the Stage: The Importance of a Well-Planned Studio Setup
Before a single shot is taken, the studio environment must be properly arranged. A well-planned setup ensures consistency, ease of shooting, and a professional atmosphere for your subject.
Choosing the Right Background
The backdrop plays a crucial role in setting the mood of a portrait. Here are some options to consider:
- Solid Color Backdrops: Black, white, and gray are versatile choices that work well for professional and creative portraits.
- Textured Backgrounds: These add depth and interest to your shots. Painted canvas or muslin backdrops work great for artistic portraits.
- Seamless Paper Rolls: Ideal for clean, high-fashion portraits, these come in a variety of colors to match different moods.
Lighting Setup for Studio Portraits
Lighting is perhaps the most critical element in studio photography. Here are a few lighting setups commonly used by professionals:
- Rembrandt Lighting: Creates a dramatic effect with a triangle of light under one eye.
- Butterfly Lighting: Positioned directly in front and above the subject, this lighting enhances facial features.
- Split Lighting: Illuminates only one side of the face, creating a high-contrast, moody look.
- Loop Lighting: A slight shadow appears beside the nose, flattering most face shapes.
Selecting the Right Camera and Lens
For studio portraits, a 50mm, 85mm, or 135mm prime lens is ideal. These lenses produce flattering perspectives without distortion. A full-frame DSLR or mirrorless camera with a high-resolution sensor ensures sharp and detailed images.
2. Perfecting the Pose: Directing Your Subject with Confidence
Even with the best lighting and equipment, a portrait can fall flat without proper posing. The key to a natural and flattering portrait is to make your subject feel comfortable.
How to Make Your Subject Feel at Ease
- Communicate: Talk to them throughout the session, offering encouragement and clear directions.
- Give Gentle Guidance: Show them examples of poses if they seem unsure.
- Use Music: A relaxed atmosphere can make a big difference in capturing natural expressions.
Essential Posing Tips for Studio Portraits
Here are a few classic poses that work well in a studio setting:
- The Three-Quarter Pose: The subject turns slightly to one side while keeping the face toward the camera. This is universally flattering.
- Crossed Arms Pose: A confident pose that works well for business and professional portraits.
- Seated Poses: Sitting naturally on a stool or chair can create a relaxed and approachable look.
- Hands in Pockets: Adds a casual, effortless feel to the portrait.
Pro Tip: Pay attention to small details like hand placement, posture, and facial expressions, as they can make or break a portrait.
3. Capturing the Perfect Shot: Camera Settings and Techniques
Getting the perfect shot straight out of the camera reduces the need for heavy retouching later. Here’s what you need to focus on:
Best Camera Settings for Studio Portraits
- Aperture: A wide aperture (f/2.8–f/5.6) helps blur the background and keep the focus on the subject.
- ISO: Keep it low (ISO 100–400) to avoid graininess.
- Shutter Speed: Around 1/125s to 1/200s works well with studio lighting.
- White Balance: Use custom white balance or shoot in RAW for better color accuracy in post-processing.
Using Reflectors and Modifiers
- Reflectors: Help fill in shadows and create a balanced exposure.
- Softboxes and Umbrellas: Soften harsh light for a more flattering look.
- Beauty Dish: Enhances facial features with a crisp yet soft light.
Pro Tip: Always review your images on a calibrated monitor to ensure accurate colors.
4. The Art of Retouching: Enhancing Without Overdoing
Post-processing is where the final magic happens. The goal is to enhance the image while maintaining a natural look.
Basic Editing Workflow
- Culling: Choose the best shots using software like Adobe Lightroom or Capture One.
- Exposure & White Balance: Adjust brightness, contrast, and temperature for a well-balanced image.
- Skin Retouching: Use frequency separation in Photoshop to remove blemishes while maintaining skin texture.
- Dodge and Burn: Enhance highlights and shadows for a more dimensional look.
- Sharpening & Color Grading: Apply subtle sharpening and color adjustments to refine the final image.
Avoid Over-Retouching
Over-smoothing skin can make your subject look unnatural. The key is to remove distractions while keeping the skin texture intact.
Pro Tip: Zoom in and out frequently while editing to ensure you’re not going overboard with adjustments.
FAQs About Studio Portrait Photography
1. What is the best lighting for studio portraits?
The best lighting depends on the style you’re going for. Softboxes and diffusers provide even, flattering light, while dramatic portraits may require hard light with deep shadows.
2. How do I pose someone who is camera-shy?
Start with relaxed, natural poses and engage them in conversation. Give them small tasks, like adjusting their jacket or looking off-camera, to make them feel more at ease.
3. Should I shoot in RAW or JPEG?
Always shoot in RAW for maximum flexibility in post-processing. RAW files retain more details and allow for better adjustments.
4. How much editing is too much?
Editing should enhance, not overpower, the natural features of your subject. If skin starts to look plastic-like or colors appear unnatural, you’ve likely gone too far.
5. What’s the best lens for studio portraits?
An 85mm prime lens is a great choice for close-up portraits, while a 50mm lens is versatile for different compositions.
Final Thoughts
Creating the perfect studio portrait requires a blend of technical skill, artistic vision, and post-processing finesse. By mastering lighting, posing, and retouching techniques, you can elevate your photography and create stunning, professional-quality portraits.
Whether you’re photographing clients, models, or even yourself, the key to a compelling studio portrait is attention to detail and a connection with the subject. With practice and patience, you’ll be able to capture images that truly stand out.
Now, it’s time to put these tips into action and create your own masterpiece in the studio!