Discover Studios, Services & More Across USA | StudioBDTLA
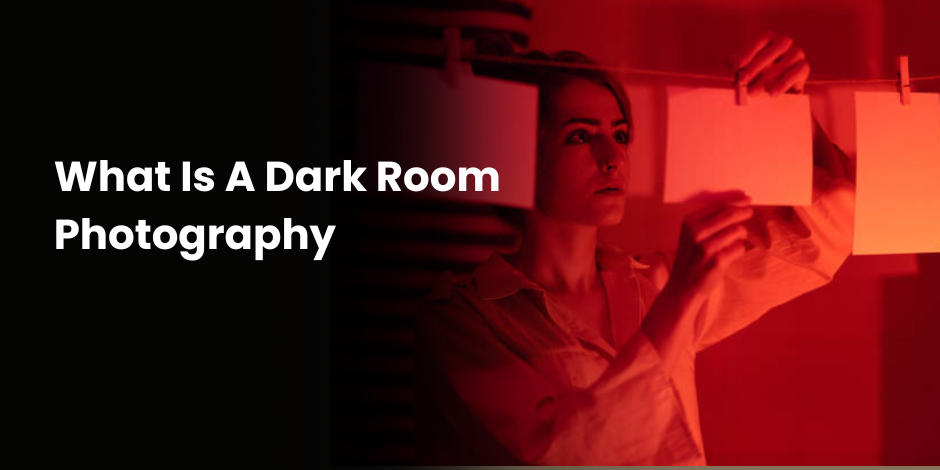
What Is A Dark Room Photography
Photography is a magical art, one that captures fleeting moments and preserves them for eternity. But there’s a special kind of enchantment found in the darkroom—a place where the alchemy of photography truly comes to life. In this blog post, we will explore the art and science behind dark room photography, offering insights, tips, and examples that will ignite your passion for this timeless craft.
The Allure of Dark Room Photography
In an age dominated by digital imagery, dark room photography may seem like a relic of the past. However, this classic method offers unique benefits that cannot be replicated by digital means. For those who crave a hands-on, tactile experience, the darkroom is an artistic sanctuary.
Understanding the Basics of Dark Room Photography
Dark room photography involves developing photographic film in a controlled, light-tight environment. This process allows photographers to manipulate the exposure, contrast, and texture of their images, providing a level of artistic control that is both intimate and rewarding.
The History of Dark Room Photography
The art of dark room photography dates back to the 19th century. Early pioneers like Louis Daguerre and Henry Fox Talbot laid the foundation for modern photography by discovering ways to capture and develop images using light-sensitive materials.
Why Choose Dark Room Over Digital?
While digital photography offers convenience and instant results, dark room photography provides a sense of craftsmanship that many find deeply satisfying. The hands-on process of developing film and making prints gives you a tangible connection to your work.
Essential Equipment for Dark Room Photography
To get started with dark room photography, you’ll need some basic equipment. This includes a film camera, developing tanks, chemicals, an enlarger, and various other tools. Investing in high-quality equipment can make a significant difference in the quality of your final prints.
Setting Up Your Dark Room
Creating the perfect dark room requires careful planning and attention to detail. From managing light leaks to ensuring proper ventilation, every aspect of your dark room setup will impact the quality of your photos.
Choosing the Right Space
Selecting the ideal location for your dark room is crucial. It should be a space that can be easily darkened and has enough room for your equipment. Basements, spare rooms, and even large closets can be transformed into functional dark rooms.
Light Proofing Your Dark Room
Light leaks can ruin your photos, so it’s essential to make your dark room completely light-tight. Use blackout curtains, weather stripping, and felt to cover windows and door gaps. A simple test with a flashlight can help you identify and eliminate any leaks.
Proper Ventilation and Safety
Dark rooms involve the use of chemicals, so good ventilation is a must. Install an exhaust fan to remove fumes and ensure fresh air circulation. Always follow safety guidelines and wear protective gear when handling chemicals.
The Process of Developing Film
Developing film is an intricate process that requires precision and patience. Each step—from loading the film to washing the negatives—plays a vital role in producing high-quality images.
Loading the Film
Begin by loading your exposed film into a developing tank. This must be done in complete darkness, so practice the steps beforehand to build confidence. Once the film is securely loaded, you can proceed to the next stages in daylight.
Mixing and Using Chemicals
Developing film involves several chemicals, including developer, stop bath, and fixer. Follow the manufacturer’s instructions for mixing and using these chemicals. Precise timing and temperature control are crucial for achieving consistent results.
Washing and Drying the Negatives
After fixing the film, wash it thoroughly to remove any remaining chemicals. Use a wetting agent to prevent water spots, and hang the negatives to dry in a dust-free environment. Proper drying ensures your images are free from imperfections.

Printing Your Photos
The dark room truly comes to life during the printing process. Creating prints from your negatives allows you to experiment with exposure, contrast, and composition, bringing your artistic vision to reality.
Selecting the Paper
Choosing the right photographic paper is essential for producing stunning prints. Different papers offer varying levels of contrast, texture, and tone. Experiment with different types to find the one that best suits your artistic style.
Using the Enlarger
An enlarger projects the image from your negative onto the photographic paper. Adjust the focus, exposure time, and aperture to achieve the desired results. Test strips can help you determine the correct exposure settings.
Developing the Print
Once exposed, the paper is processed through a series of chemical baths—developer, stop bath, and fixer. Each step should be timed accurately to ensure consistent results. After processing, wash the print thoroughly and allow it to dry.
Creative Techniques in Dark Room Photography
Dark room photography offers endless opportunities for creativity. From dodging and burning to experimenting with different developers, there are numerous techniques to enhance your images.
Dodging and Burning
Dodging and burning involve selectively lightening or darkening areas of your print. Use tools like cardboard cutouts or your hands to manipulate the exposure during printing. This technique can add depth and drama to your photos.
Split Toning
Split toning is a method of adding color to black-and-white prints. By using different toners, you can create images with unique hues and tones. This technique adds a new dimension to your work, making it stand out.
Experimenting with Developers
Different developers can produce varying effects on your photos. Experiment with different formulations to achieve the desired contrast, grain, and tonal range. Keep detailed notes to replicate successful results.
Common Challenges and Solutions
Dark room photography comes with its own set of challenges. From dealing with dust and scratches to mastering chemical handling, understanding these issues and their solutions will help you become a more proficient photographer.
Preventing Dust and Scratches
Dust and scratches can ruin an otherwise perfect photo. Keep your dark room clean and use anti-static cloths to wipe down equipment. Handle negatives with care and store them in protective sleeves.
Mastering Chemical Handling
Proper chemical handling is crucial for safety and consistency. Always measure chemicals accurately and maintain the recommended temperatures. Wear gloves and goggles to protect yourself from potential hazards.
Troubleshooting Common Issues
From underexposed negatives to uneven development, various issues can arise during the dark room process. Familiarize yourself with common problems and their solutions to minimize frustration and improve your skills.
The Joy of Dark Room Photography
Despite the challenges, dark room photography offers immense rewards. The tactile nature of the process, the satisfaction of creating a beautiful print, and the deep connection to your work make it a fulfilling art form.
Building a Community
Joining a community of fellow dark room enthusiasts can enhance your experience. Share tips, exchange ideas, and learn from others who share your passion for analog photography.
Continuing Education
Stay updated with the latest techniques and trends in dark room photography. Attend workshops, read books, and follow online forums to continually improve your skills and expand your knowledge.
Preserving the Art Form
By practicing and promoting dark room photography, you contribute to preserving this timeless art form. Encourage others to explore the world of analog photography and keep the magic of the dark room alive.
Frequently Asked Questions
Is dark room photography expensive?
While initial setup costs can be high, the ongoing expenses are relatively low. Secondhand equipment and bulk purchasing of chemicals can help reduce costs.
Can I set up a dark room in a small space?
Yes, you can set up a functional dark room in a small space like a bathroom or closet. Focus on light-proofing and ventilation to create an efficient workspace.
How long does it take to learn dark room photography?
With dedication and practice, you can become proficient in a few months. Start with basic techniques and gradually explore more advanced methods as you build confidence.
Do I need any special skills to start dark room photography?
No special skills are required to start. However, attention to detail, patience, and a willingness to learn will greatly benefit your progress.
Final Thoughts
Dark room photography is a captivating and rewarding art form that offers a deep connection to the photographic process. Whether you’re an experienced photographer or a curious beginner, the dark room provides a space to explore, create, and grow. If you’re interested in embarking on this magical journey, consider reaching out to local photography clubs or online communities for support and guidance. Happy developing!